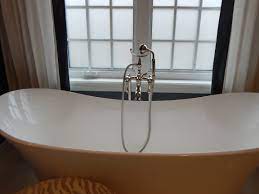
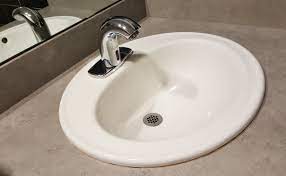
There is a lot of plumbing in the bathrooms, including drains & water supply pipes. Water from sinks, toilets, tubs, & showers all goes into one ordinary sewer pipe.
These bathroom accessories are supplied with both hot and cold water through supply routes that branch in their direction. Bathroom plumbing rough-in refers to setting up the pipes & drain lines for connections after a fixture is installed.

This procedure is typically carried out while installing a new bathroom.
What Does Plumbing Rough-In Mean?
Plumbing rough-in is a crucial stage in the construction or renovation of a building, and it refers to the installation of the plumbing system’s basic framework. It includes the installation of the pipes, fittings, and fixtures that make up the plumbing system. The rough-in stage is usually completed before the walls and ceilings are finished, making it easier for the plumbing contractor to access the pipes and fixtures.
During the rough-in stage, the plumbing contractor will install the waste and supply lines, which are the essential components of the plumbing system. They will also install any necessary vents, which help to prevent the buildup of gas and ensure the proper flow of wastewater. The contractor will also install any necessary shut-off valves and water pressure regulators, which are crucial components of the plumbing system.
Once the rough-in stage is complete, the plumbing system is checked for leaks and pressure tested to ensure it functions correctly. If any problems are found, they can be addressed before the walls and ceilings are finished.
A plumbing is “roughing it” signifies getting closer to completion. This is a broad word used in construction to describe installing electrical and plumbing infrastructure inside a building. Rough-in plumbing essentially denotes planned pipe and drainage. Even though the project’s pipeline rough-in stage has yet to complete when it is finished, it must be spent installing the sink, showerhead, toilet, and other fixtures.
Terms for Rough-In Dimensions
Centerline is a common phrase used to describe plumbing dimensions. Similar to the building word “on-center,” “centerline” refers to a hypothetical vertical line that is traced through an essential point of reference (usually the drain pipe). If two pipes are to be spaced 10 inches apart, for instance, you weigh 10 inches between the centers of the lines rather than 10 inches between their borders.
The base floor height is another often used phrase. In newly constructed homes, this is regarded as the subfloor or the finish flooring (in remodeling).
Remember that not all measurements are absolute; consider these dimensions broad principles. They will change based on your bathroom. For more specific measurements, refer to the instructions accompanying fixtures (sink, tub, etc.).
How is a rough-in for a bathroom sink drain done?
Three inches above the drain are roughed-in water lines for the bathroom sink. Measure (about) 21 inches above the finished floor. The hot and cold lines are separated by 8 inches (left to right). From the middle of the drain, measure 4 inches to the left and 4 inches to the right.
Read More: Channel Drain Installation
Details of the toilet rough-in
The supply line’s height is:
The water supply pipe for the toilet should enter the space 8 1/4 inches above the floor. In general, a hole between five and ten inches well above the bed is made by this cold-water-only pipe.
Horizontal supply line:
The water supply route is measured horizontally from the midline, passing vertically through the toilet’s center. The hole for the water supply route should be 6 inches from the center. To verify the location of the water supply connection, examine the toilet.
Drainage hole at the back wall:
The hole is 12 1/2 inches away from the back wall.
Longitudinal discharge hole:
The drain is at floor level; there is no distance.
Side-to-side buffering fixture
The minimum distance from either side of the toilet’s center. Fifteen inches must be left between any wall and any other fixture; if the bathroom’s design permits, 18 inches are advised.
Steps for Installing Your Plumbing Roughly:
This tutorial will demonstrate how to rough the plumbing in 4 straightforward steps.
Step 1: Mark Important Locations
Determine the location of each toilet, mark the wall’s center, then measure out 13.5 inches from that location. At that location, mark a spot on the floor for the bathroom flange. Trace a line around the ring’s perimeter after centering the actual flanges on top of the mark.
Step 2: Construct the drain hole
The specified section should be cut off, and the flange should be positioned inside the hole, with usually two slots on either side. Using shimming as necessary, connect the flange to the floor.
Step 3: Installing the Drain Pipe
The vent assembly and the drainpipe trap must be mounted below the floor. Remember that all subfloors are constructed during roughing-in construction, making installing drains beneath the floor simple. Use a 3-inch long 90-degree turn fitting to direct the chute toward the main waste-water pipe, often known as the “waste stack,” before connecting it into a 3-inch by 3-inch besides 2-inch Y-shaped fitting. Place the Y fitting so the main vent pipe may be attached to the 2-inch opening.
Step 4: Installation of the supply line
Place a supply line that exits closest to the edge of the toilet-tank water system fixture by running it through the wall or wall. The water line entering the central outlet of the “T” fitting should extend upward after being attached to the supply line’s top. The portion of the “T” that will serve the toilet should have an 8-inch supply line and a screw-on cap valve to provide an air space to minimize the “water hammer.”
It’s time to notify the building inspector that the plumbing is roughed. If all the procedures were followed correctly, you should be given the go-ahead to start the last stages necessary to finish your plumbing installation.
Rough-in plumbing for a basement bathroom: How to Finish It?
Adding a bathroom is strongly advised if you turn your basements into a bedroom, guest room, or rental unit. But possessing a bathroom will be more convenient even if you’re only using it as a pleasure or hobby room.
Is Bathroom Plumbing Rough-In Do-It-Yourself?
A DIY attempt at finishing a basement with rough-in plumbing could result in multiple code violations, pricey repairs, and expensive redos, even though there may be instructions or movies on the subject. Therefore, hiring seasoned plumbers to complete this work is essential.
It would be regrettable if improper plumbing installation necessitated the partial or entire demolition of a freshly constructed basement bathroom.
For instance, poor artistry could result in pipelines or pipe joints failing, causing either slow or immediate water damage. Tiles would have to be taken out, and the walls would have to be raised to fix this problem.
FAQ
- Can a sink and toilet share a drain?
Connect the 3-inch drainpipe that flows from the toilet by running the lower sink drainpipe and adding elbow or collar attachments as necessary. If possible, link the sink drain to the toilet drain inside 6 feet of the toilet. The exact design will depend on your bathroom’s architecture and the orientation of the floor joints.
- What is a vanity drain’s rough in height?
A hole at the bottom of the vanity, usually 22 to 24 inches above the finished floor, receives the water system line that emerges from the wall. The water system line is only 4 inches away from the sink drain.


